
Note: This article pertains to the 1969 and other 60's Triumph 650 4-speed gearboxes using plunger and spring. If you're on a 5-speed gearbox, or one with a leaf-spring, read John Healy's Britbike.com posts on Leaf-spring and 5-speed gearboxes.
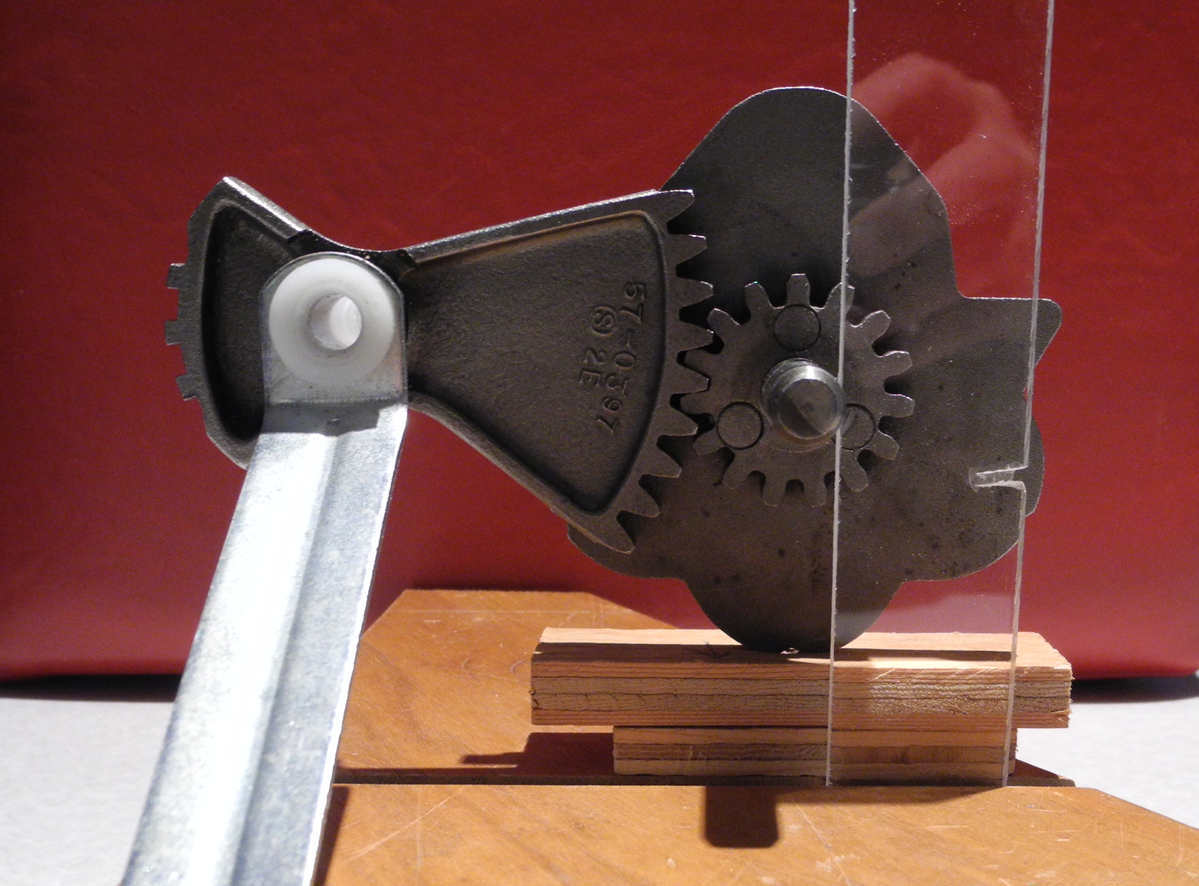
When you move the gearshift pedal it causes the gearshift spindle and plunger assembly (also known as the "gear change quadrant") to rotate in a limited arc, either up or down. See Figure 1 below.
The gearshift quadrant's plungers (also known as "pawls") engage steps on the inner quadrant, moving it up or down one position at a time.
When the inner quadrant moves, it rotates the camplate which operates the gearshift selector forks. The forks slide the gears back and forth on the main- and layshafts for gear changes.
In Figure #1, see how raising the gear shift pedal to upshift rotates the gear change quadrant clockwise. That releases the TOP pawl from the guide plate to engage the "stepped" inner quadrant and push its outboard end DOWN and its inboard end UP.
Gears on the inboard end of the inner quadrant mesh with the camplate's and turn the camplate clockwise. The camplate movement drives pegs on the shift forks and the forks arrange the gear cluster into the next higher gear.
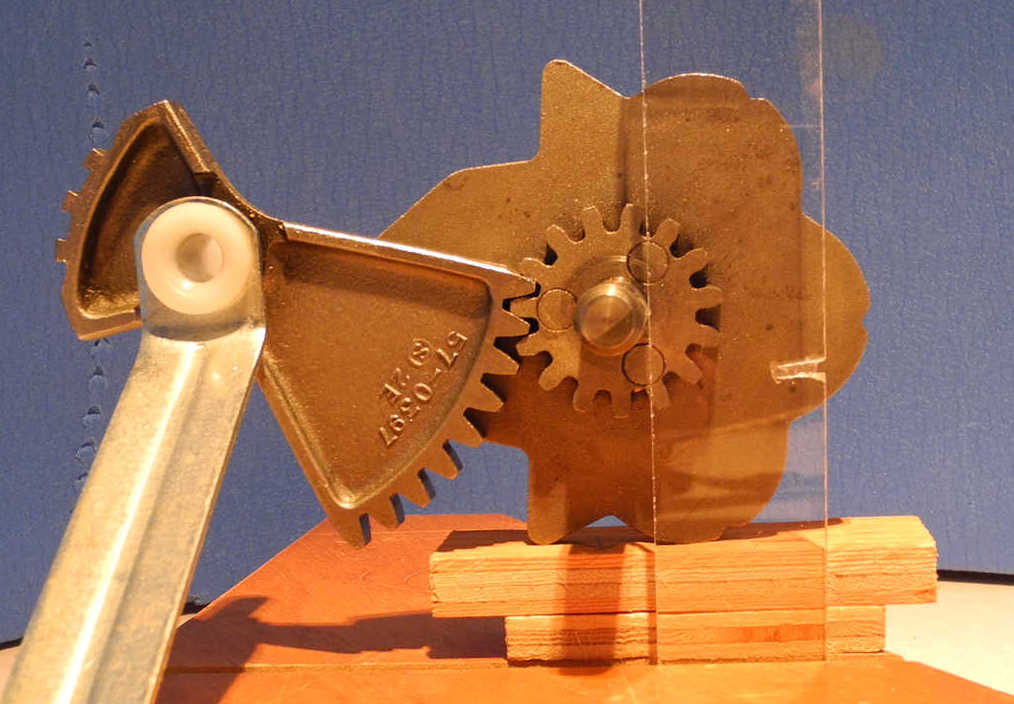
 Figure 1. Gear shifting linkage for 4-speed unit 650 Triumph motorcycle. Camplate shown in neutral between 2nd and 3rd gears. Detailed photos of gearbox gearshift components.
Table 1. shows the motions made by all of the gear shift linkage components when up-shifting and down-shifting.
| Component | Up Shift | Down Shift |
| Gear shift pedal | Up | Down |
| Gear shift spindle & plunger assy | Clockwise | Counterclockwise |
| Plungers (pawls) | Down | Up |
| Quadrant, outboard end | Down | Up |
| Quadrant, inboard end | Up | Down |
| Camplate | Clockwise | Counterclockwise |
| Gear selector forks |
Indexing the gearbox means to correctly position the inner quadrant relative to the camplate when installing the inner gearbox cover. If the teeth on the inner quadrant and the camplate are meshed incorrectly relative to each other, one or more gears will be inoperable.
During gearbox assembly, the camplate is initially positioned in a particular gear. Then, as the inner cover is pushed into place the inner quadrant is held in the position that corresponds to the same gear as the camplate.
Four-speed spring and plunger gearboxes are conventionally assembled and indexed in one of three gear positions:
Which gear you use comes down to personal preference, but there are some criteria available to help make your choice.
The Triumph workshop manual assembly and indexing method employs the neutral between 2nd and 3rd gears. Indexing that way relies solely upon visual cues that are rather vague and the assembly itself requires a considerable degree of dexterity and coordination, not to mention luck. It's not uncommon for sucess to take a few tries.
As John Healy once pointed out on Britbike.com, using either 1st gear or 4th gear adds a tactile element to the indexing operation that is very helpful, though not completely without its own perils.
Indexing in 4th gear offers the improvement of being tactile, but assembly in that position suffers from the same drawbacks as using the neutral between 2nd and 3rd gears.
That brings us to the lesser known method of assembling and indexing with the camplate in 1st gear position. It's my personal preference because for me it's the easiest, surest, and fastest method. I say this as a rank amateur, but even the experienced, mechanically-inclined gush over how easy this method is when they try it for the first time.
The late and great Hughie Hancox assembled and indexed gearboxes with the camplate in 1st gear position.
As explained by Hancox on his DVD, the indexing technique is to tip the inner quadrant just enough that it slides along the floor of the gearbox as you push on the inner cover. When the cover is nearly on (1/4-3/8" gap) the inner quadrant can be felt touching the camplate inside. At that point, back the cover off just enough to free the inner quadrant so you can raise it up onto the first tooth and push the cover all the way home. See Photos 1 and 1-a.
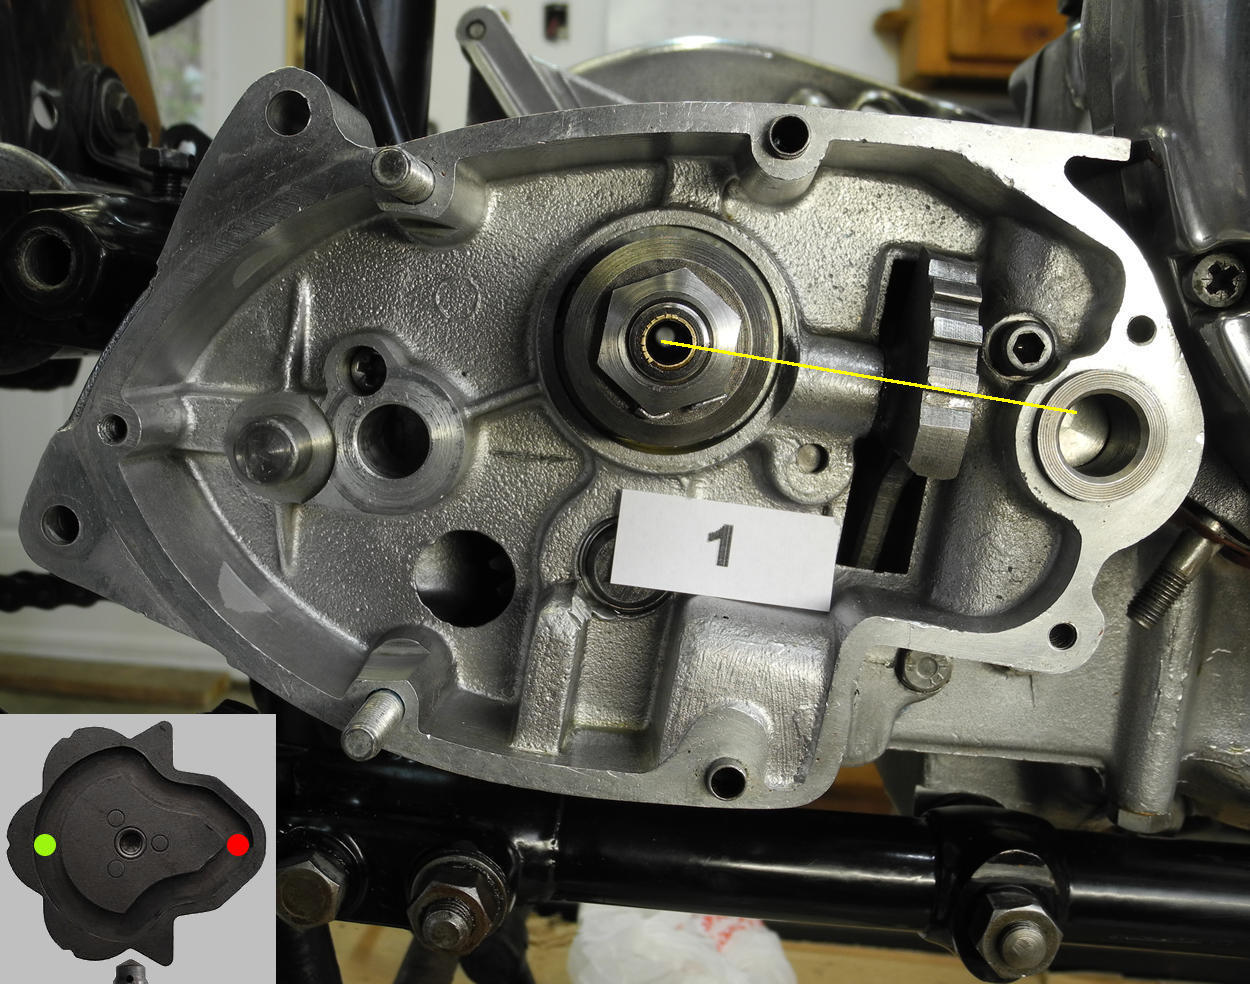 Photo 1.
The workshop manual has you maintain the inner quadrant in the position corresponding to the camplate in neutral between 2nd and 3rd gears as you push on the inner cover. See Photos 2 and 2-a.
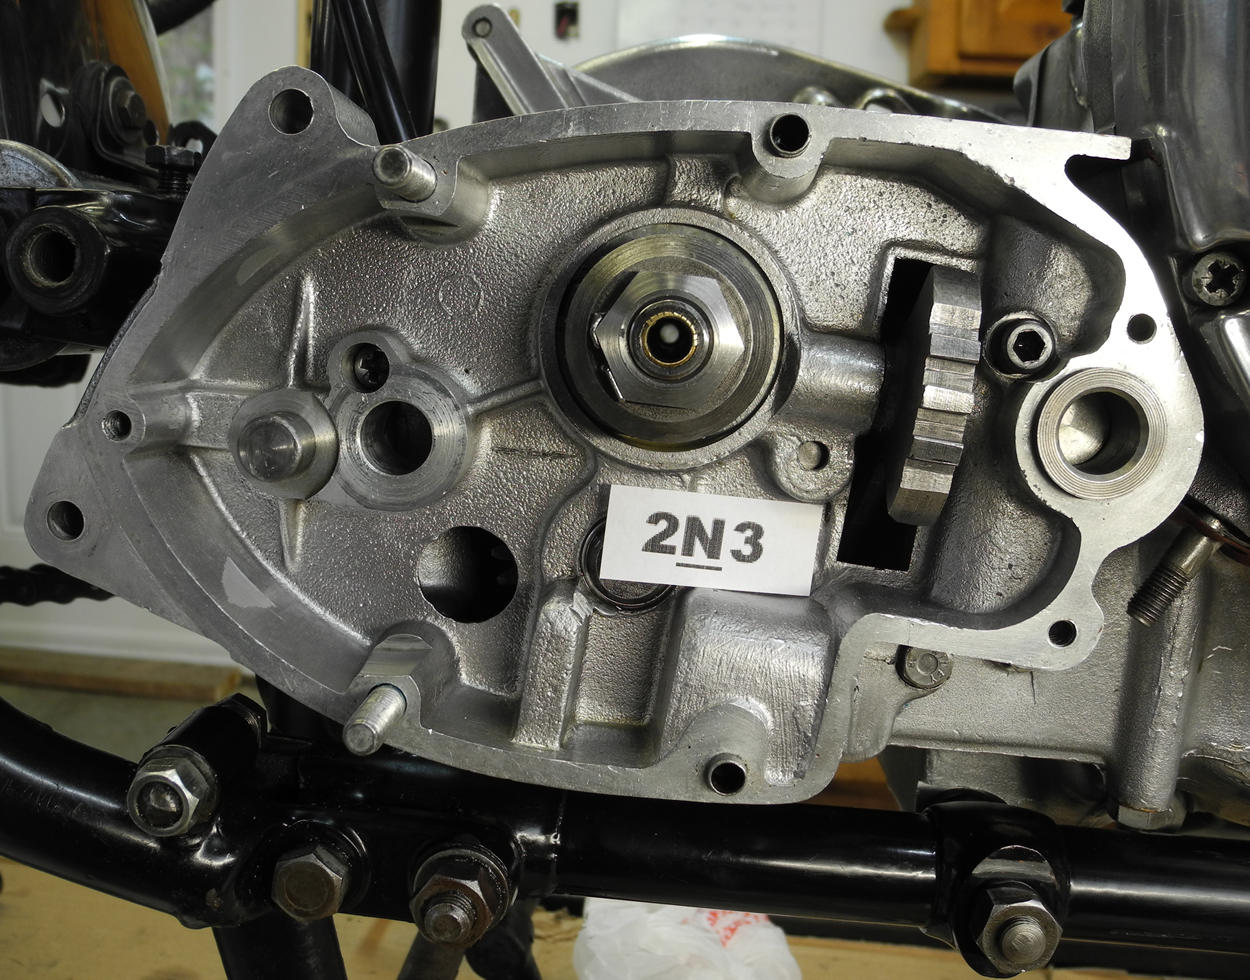 Photo 2.
The only difference between indexing in 4th gear and 1st gear is that you run the inner quadrant against the top of the gearbox and then lower it one tooth into position while pushing on the inner cover. See Photos 3 and 3-a.
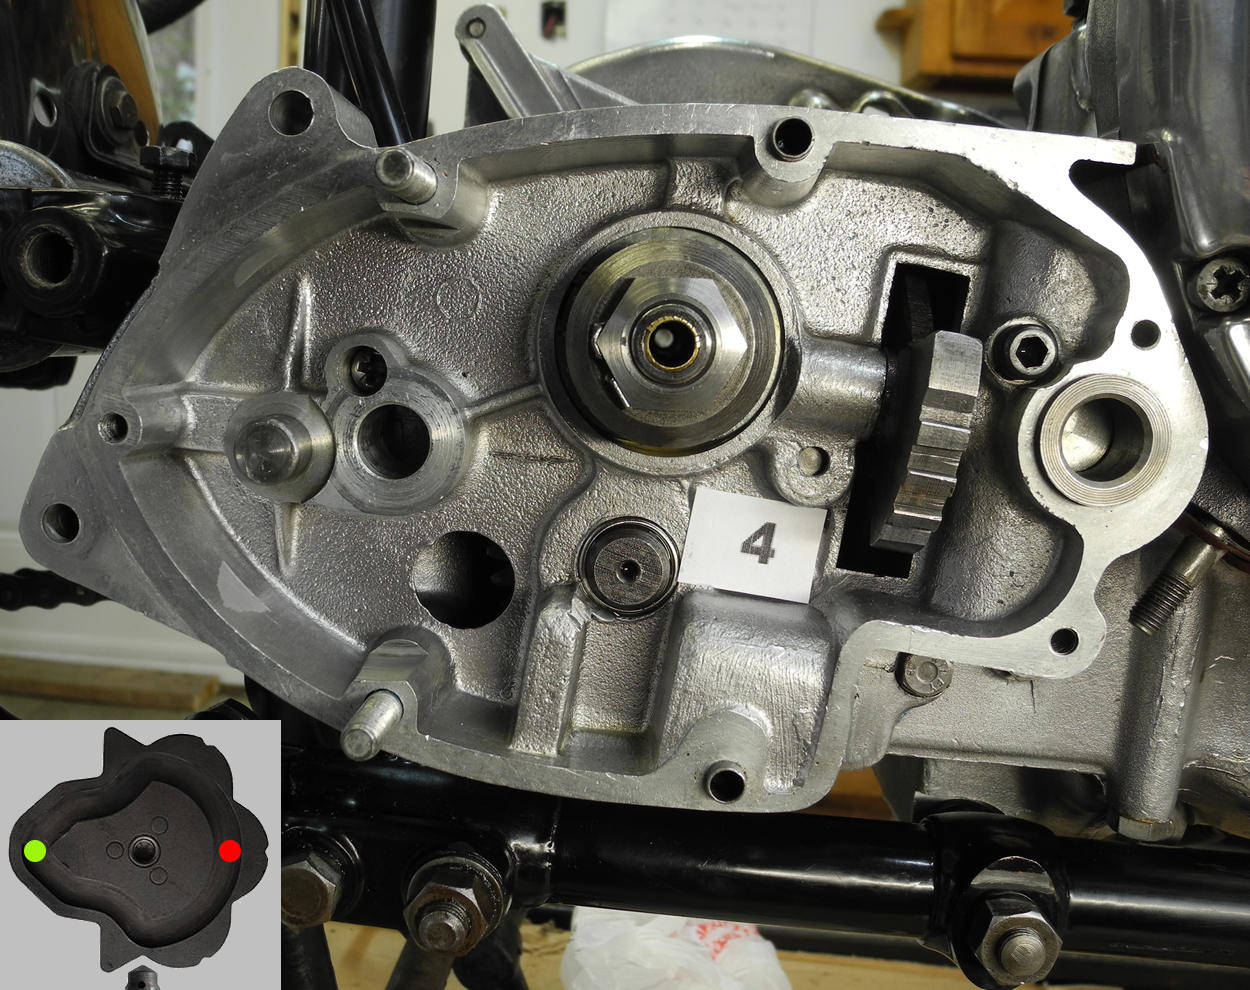 Photo 3.

After indexing a gearbox, always check gear selection before going on to install the outer cover. Do this by operating the inner quadrant with a screwdriver (or a robust pair of wide-mouth pliers) to verify that all four gears are working properly. When selecting gears this way it helps to gently bump the rear wheel to make the gears slide into place.
For completeness, Photos 4, 5, and 6 below illustrate the inner quadrant in its remaining positions.
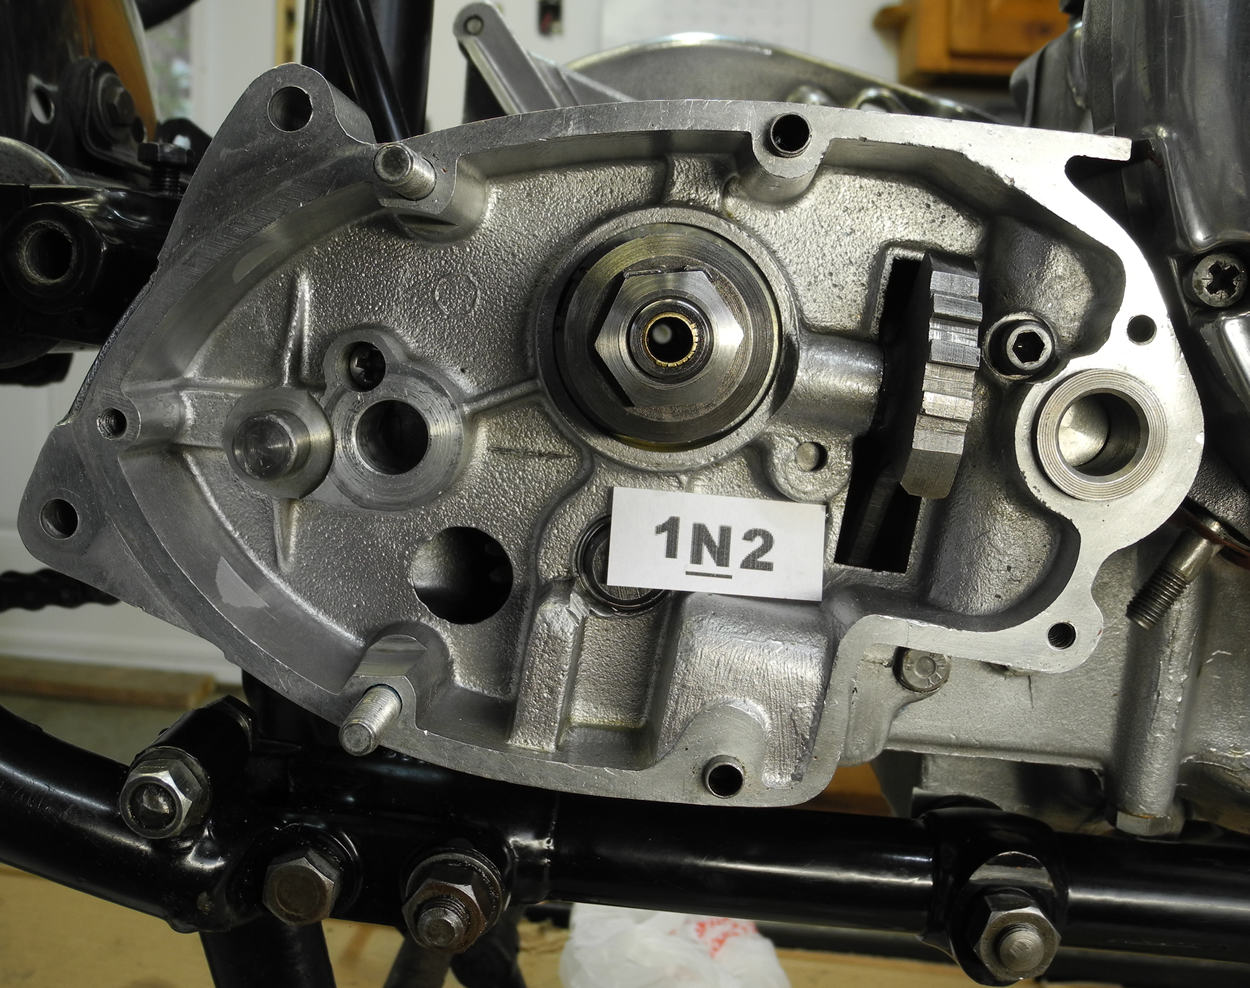 Photo 4. Neutral between 1st and 2nd gears.
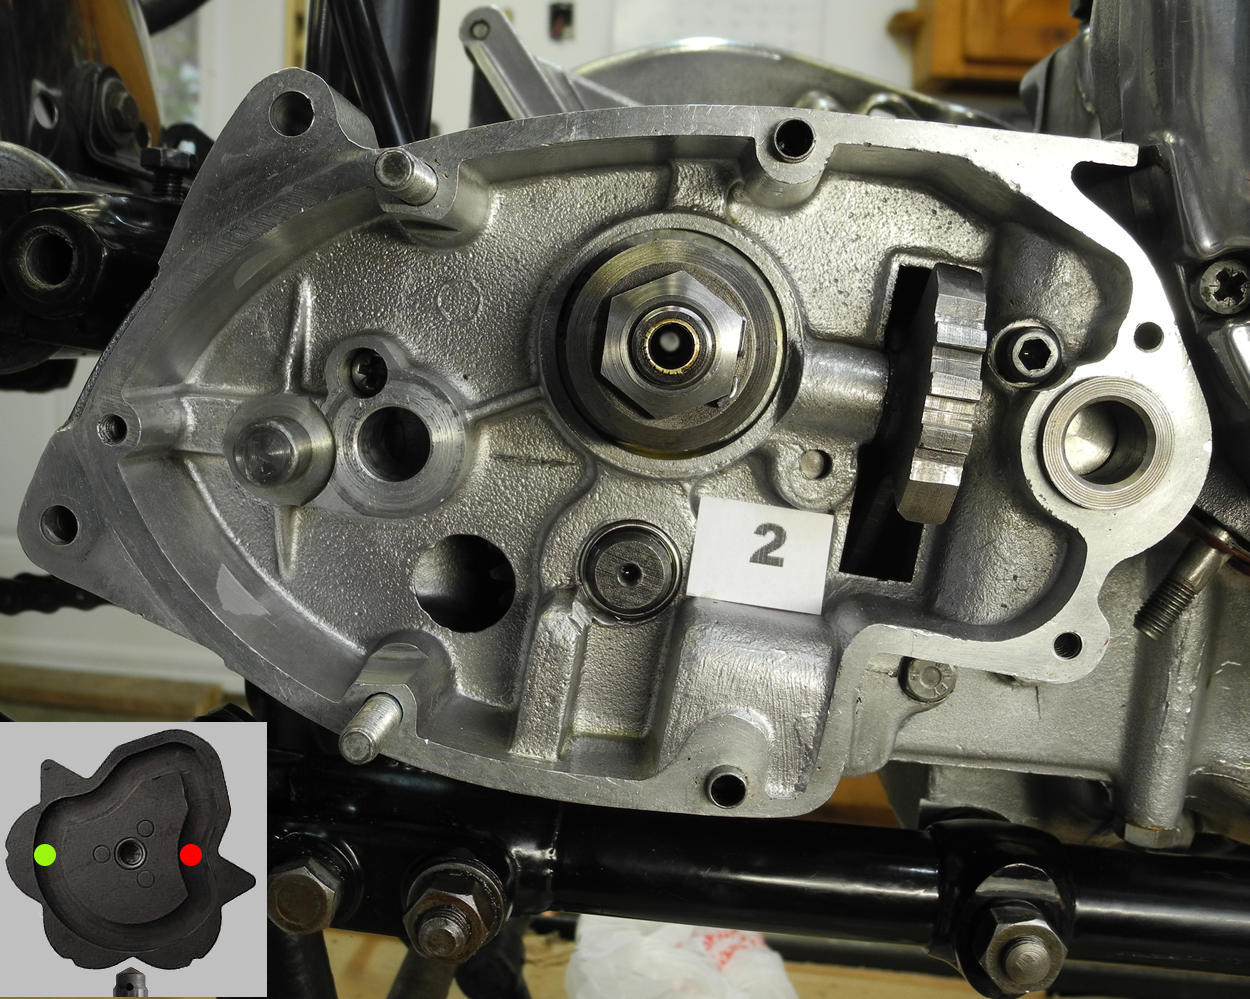 Photo 5. 2nd gear.
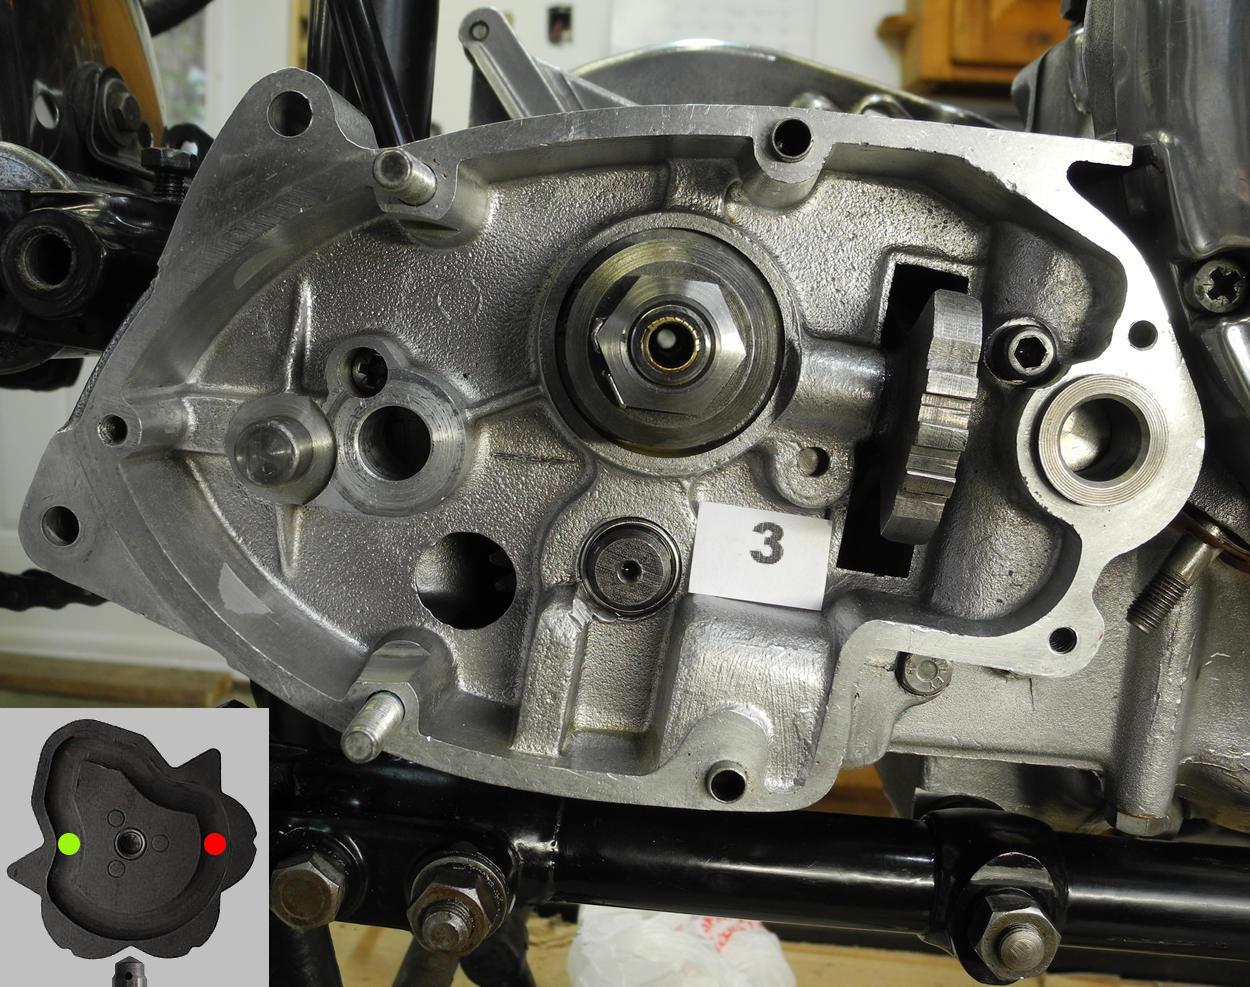 Photo 6. 3rd gear.
 Gearbox Chapter of the "Bonnie Ref"
 Camplate and Gear Cluster Photo-Animation
Gearbox Component Reference Photos
Camplate and Gear Cluster Photo-Animation
Gearbox Component Reference Photos
 Gearbox Exploded Drawings
Scroll down to Figures 8 "Gearbox Gears & Shafts" and 9 "Gearbox Outer Cover" in left pane. Click on the figures to see parts, part numbers, description, sizes, etc.
Gearbox Exploded Drawings
Scroll down to Figures 8 "Gearbox Gears & Shafts" and 9 "Gearbox Outer Cover" in left pane. Click on the figures to see parts, part numbers, description, sizes, etc.