
On his terrific DVD set, "Unit 650 Engine Rebuild", Hughie Hancox demonstrates a gearbox assembly method so easy that even someone as maladept as me can use it easily and successfully.
Prior to falling on Hancox's technique I used the workshop manual method a couple of times. Awkward, challenging, frustrating. And eventually it would work. Believe me! Hancox's method wins hands down!
Note:
These instructions are for unit 650 4-speed gearboxes with spring and plunger.
If you are working on a 5-speed gearbox, or a gearbox with a leaf-spring instead of
a plunger, read John Healy's Britbike.com posts on Leaf-spring and 5-speed gearboxes.
Hancox first builds up the gear cluster and selector forks piece-by-piece right inside the gearbox. He then inserts the mainshaft, previously pre-assembled with the inner cover and kickstarter parts, right through the gears and pushes on the inner cover.
When all the parts are organized and lined up ready to go (see Photo 1 below), a gearbox can be assembled with the inner cover ready for indexing in just a couple of minutes. The first time I used this technique I was so stunned by its simple perfection that I pulled everything out and did it over! Believe me - that was a first!
The first few times I used the method I stuck to installing the mainshaft by itself, then the inner cover, and later, after indexing, the kickstart ratchet assembly. Eventually I tried Hughie's method of putting the mainshaft in a vice and pre-installing the inner cover and kickstarter parts. Better in so many ways - the man knew his stuff!
Photo 1 shows the gearbox components in their order of assembly, from left to right. The only things missing are the thrust washers. Click here for larger illustration.
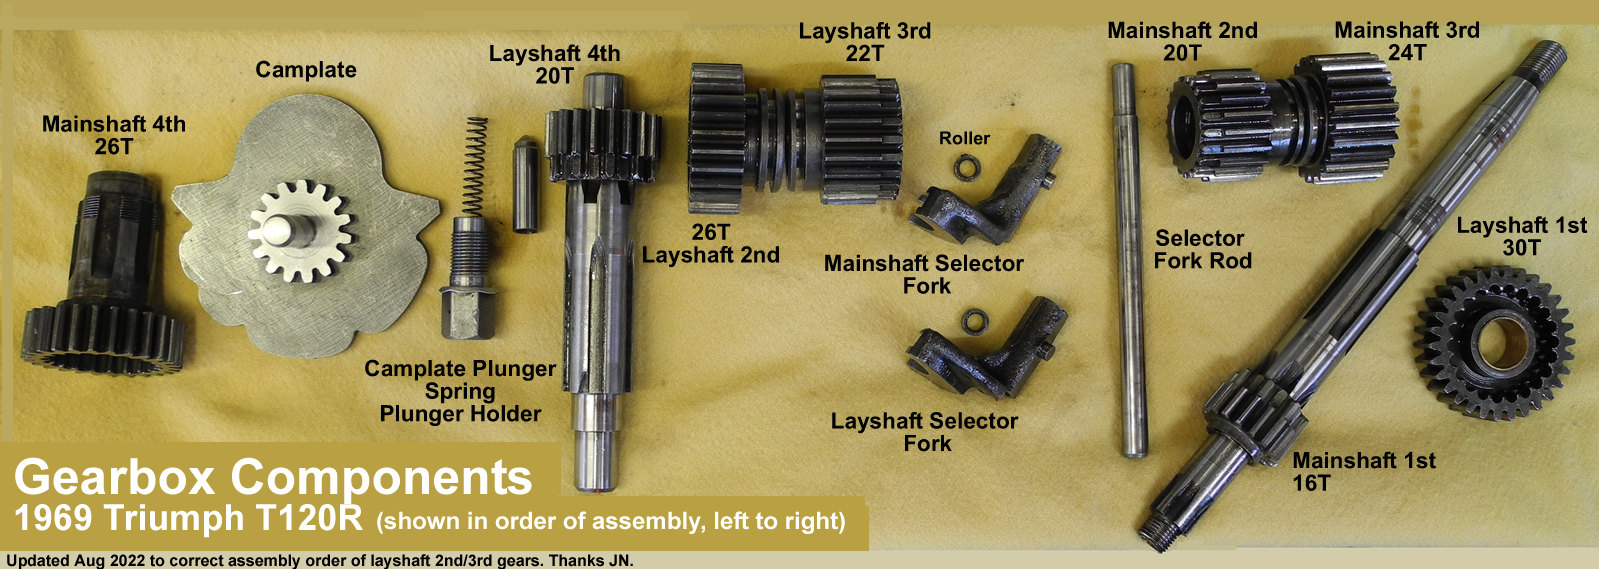 Photo 1. Order of assembly, from left to right.
Photo 2 shows an assembled gear cluster in 1st gear from the rear. Click here for stop-action animated photos of the gears changing. (Note - on some Internet connections it takes a little time to load before beginning).
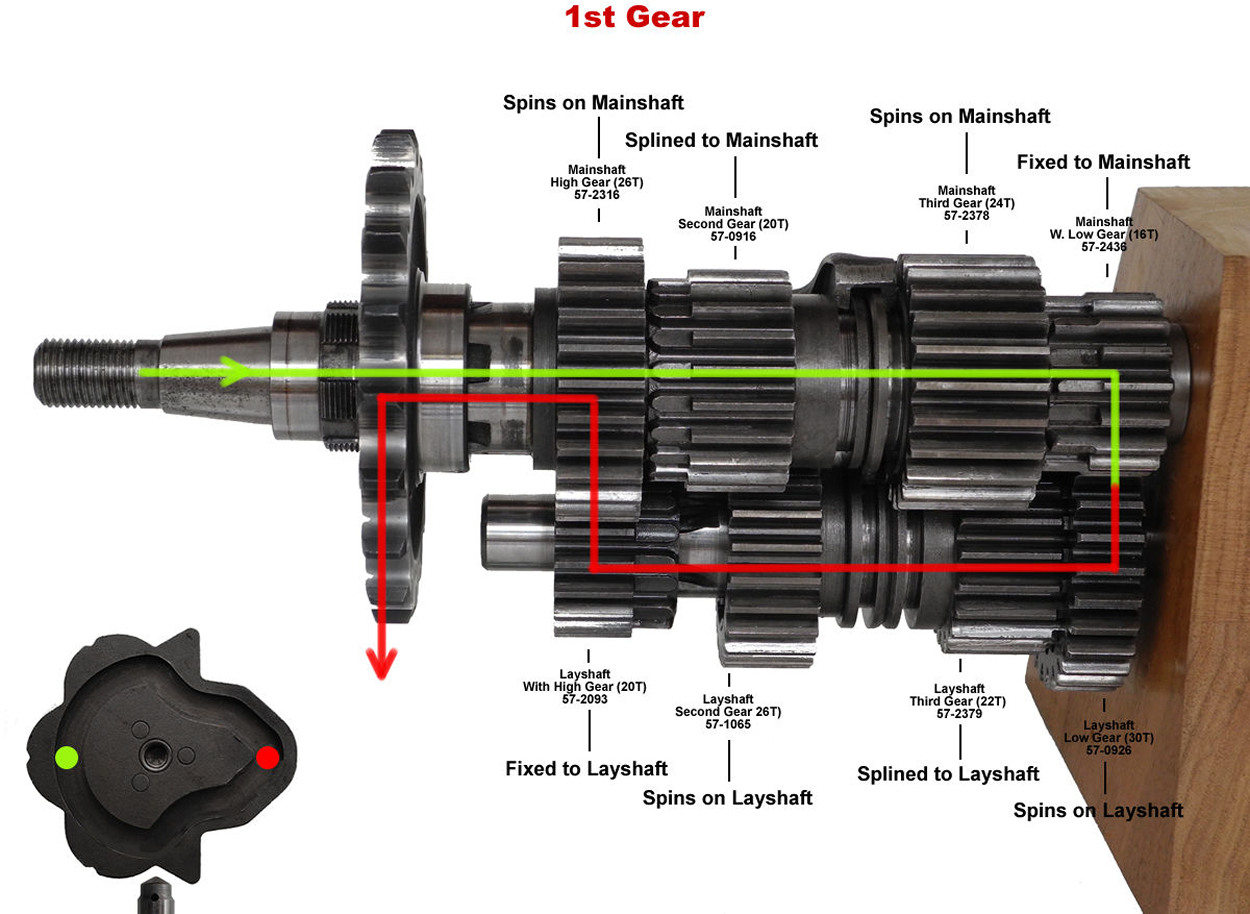 Photo 2. Gear cluster, rear view. We can just see the top claw of the mainshaft shifting fork in the photo.
Long ago on Triumphrat.net, "Furious Furball" suggested that when reassembling the gearbox it is helpful to put the bike on its sidestand.
Here are the bare-bones assembly steps:
Before proceeding with the following assembly steps you must have previously installed:
You could also install the gearbox sprocket at this time, but that makes it nearly impossible to effectively seal the shifting fork rod where it fits through the gearbox casing. Failure to seal the shifting fork rod and/or the mainshaft splines is an invitation to oil leaks, especially when the motorcycle is on its side stand.
Put in place the inside thrust washer with the grooves facing the gears, not the case. Check to see that it sits well on the locating peg and flush against the casing. Now remove the thrust washer, dab a bit of the stickiest grease you have on the backside and reinstall it as before. Don't get grease or oil on the grooved side so as to avoid the washer sticking to the gear and getting pulled off its peg
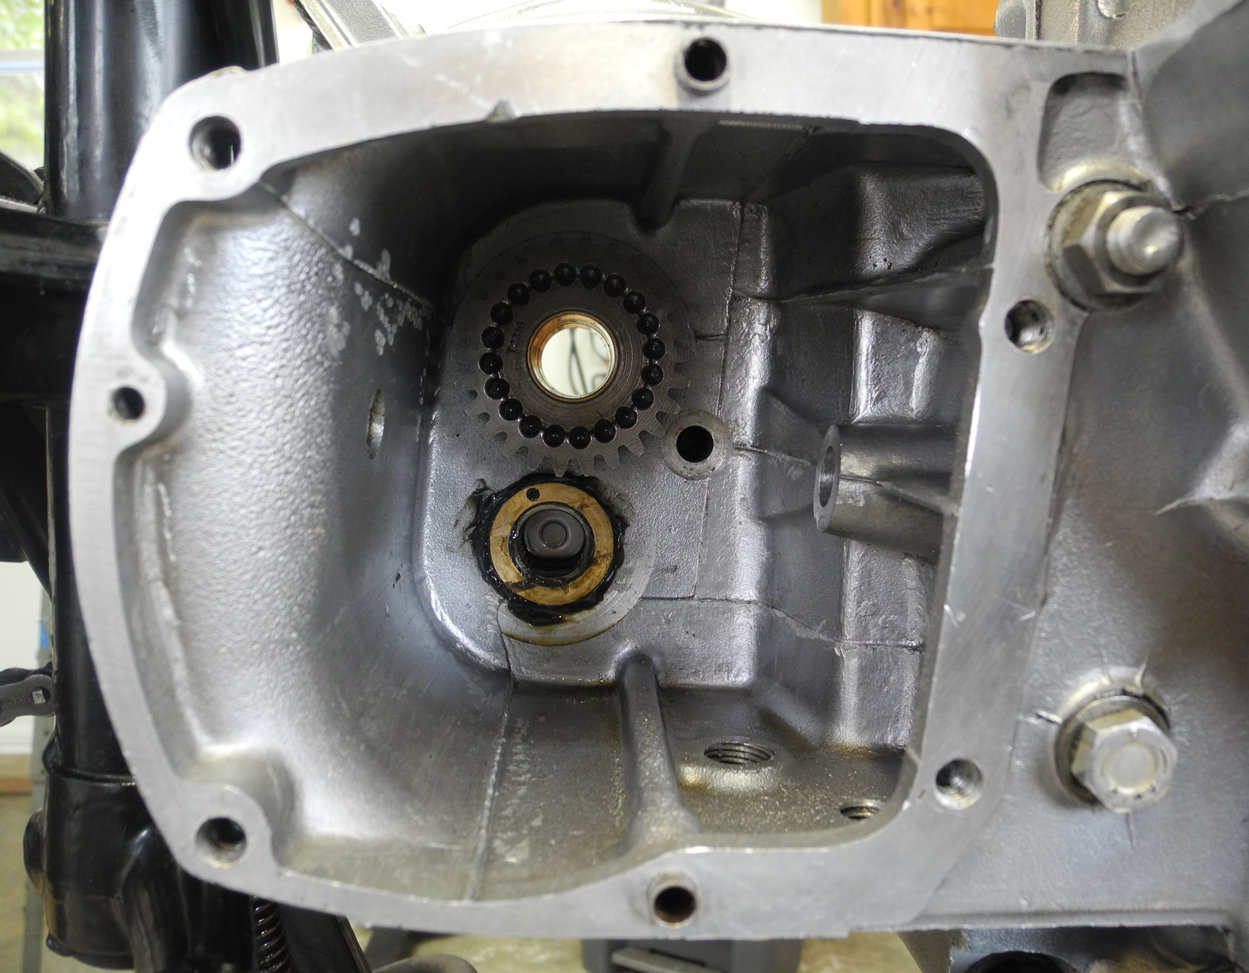 Photo 3. A dab of grease helps hold thrust washer in place during assembly. Azimuth of your locating peg will vary from that shown.
Lubricate the camplate plunger and spring and fit them into the gearbox case with the index plunger holder.
Lubricate the gearshift camplate shaft, depress the camplate plunger with screwdriver, and fit the camplate in its 1st gear position as shown.
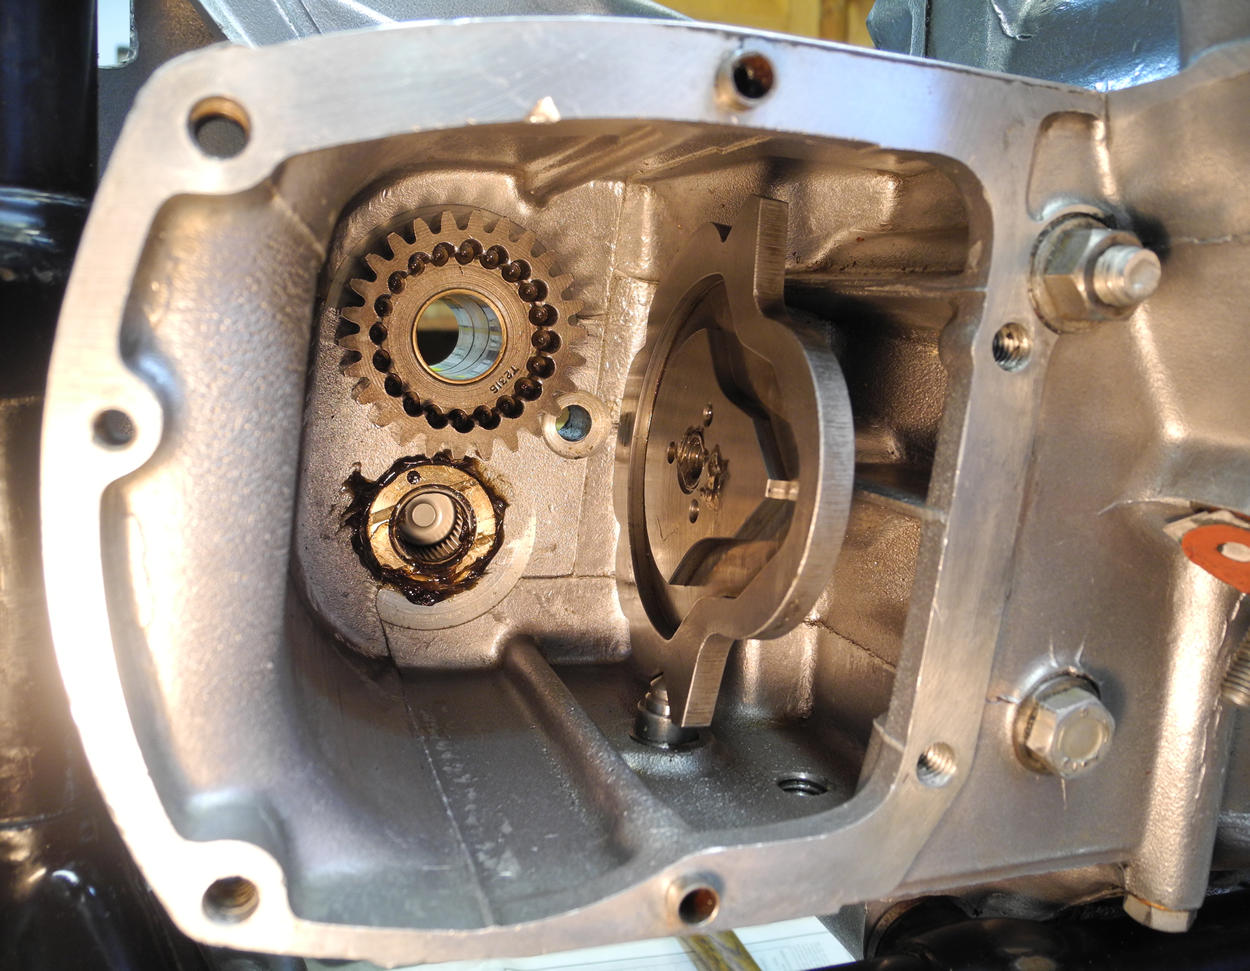 Photo 4. Thrust washer, and gearshift plunger and camplate in place.
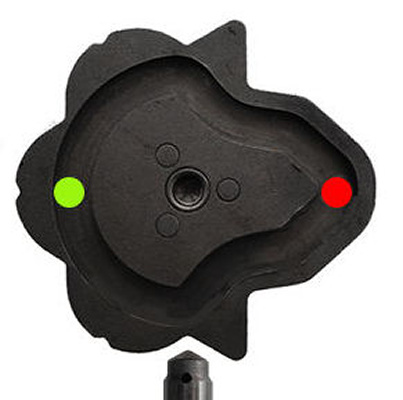
The photo at right shows the gearshift plunger and camplate in 1st gear position. The red dot represents the position of the layshaft selector fork peg, and the green dot represents the mainshaft selector fork peg in 1st gear.
Hancox next installs the layshaft complete with 2nd & 3rd gears. When you do it that way, the gears obscure the thrust washer and bearing hole from view.
Since a thrust washer falling off its peg un-noticed is a fairly common assembly error, I chose to install the layshaft solo and then slide on 2nd & 3rd gears afterwards. That gave me a better opportunity to check that the washer was still in place after the layshaft was installed through it.
So, using lubrication, insert the layshaft and layshaft highgear through the drive side (DS) layshaft needle bearing.
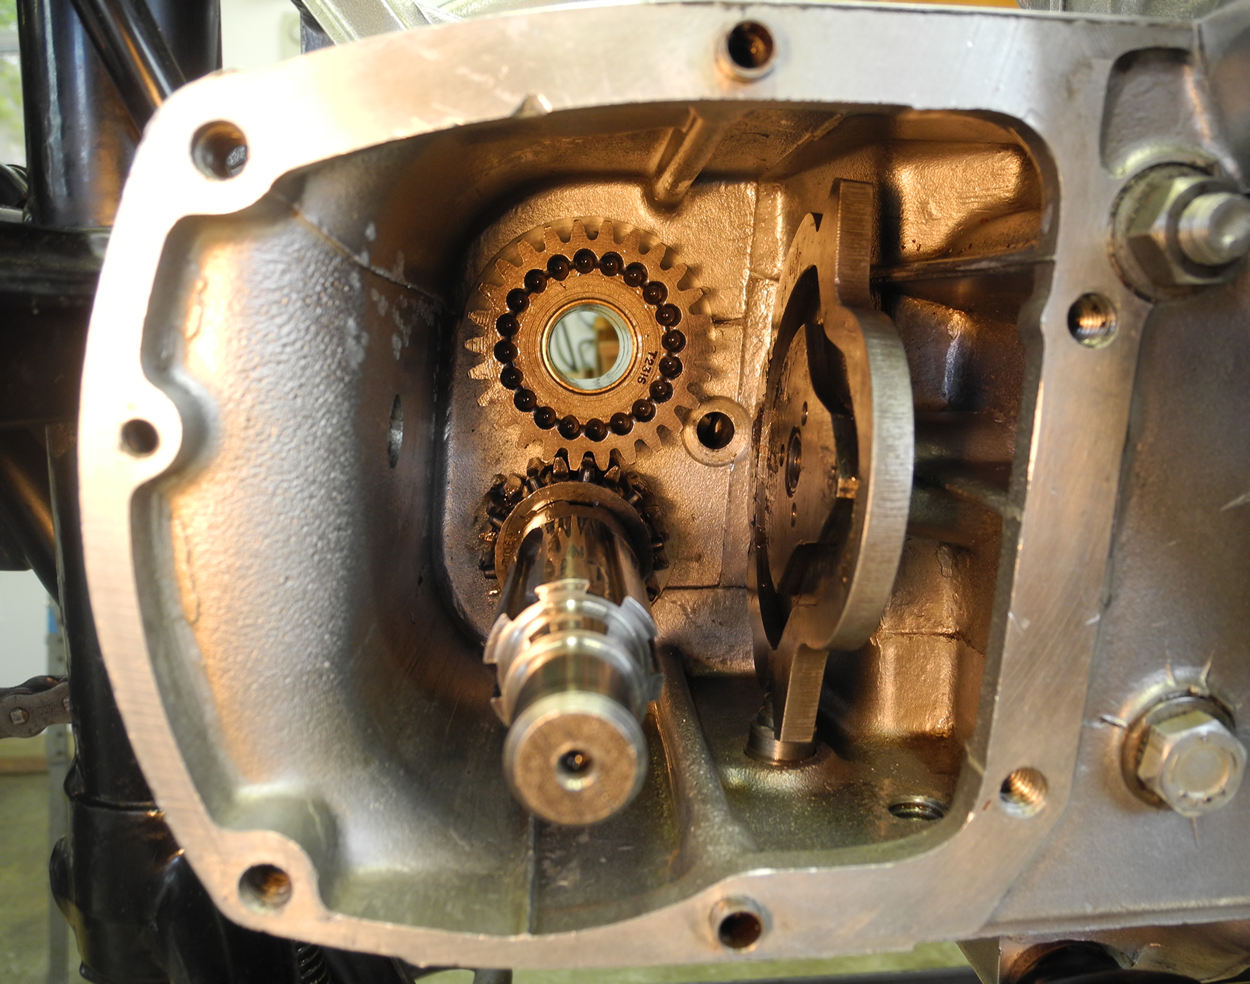 Photo 5. Layshaft installed.
With the layshaft installed, lubricate its splines and slide on 2nd gear.
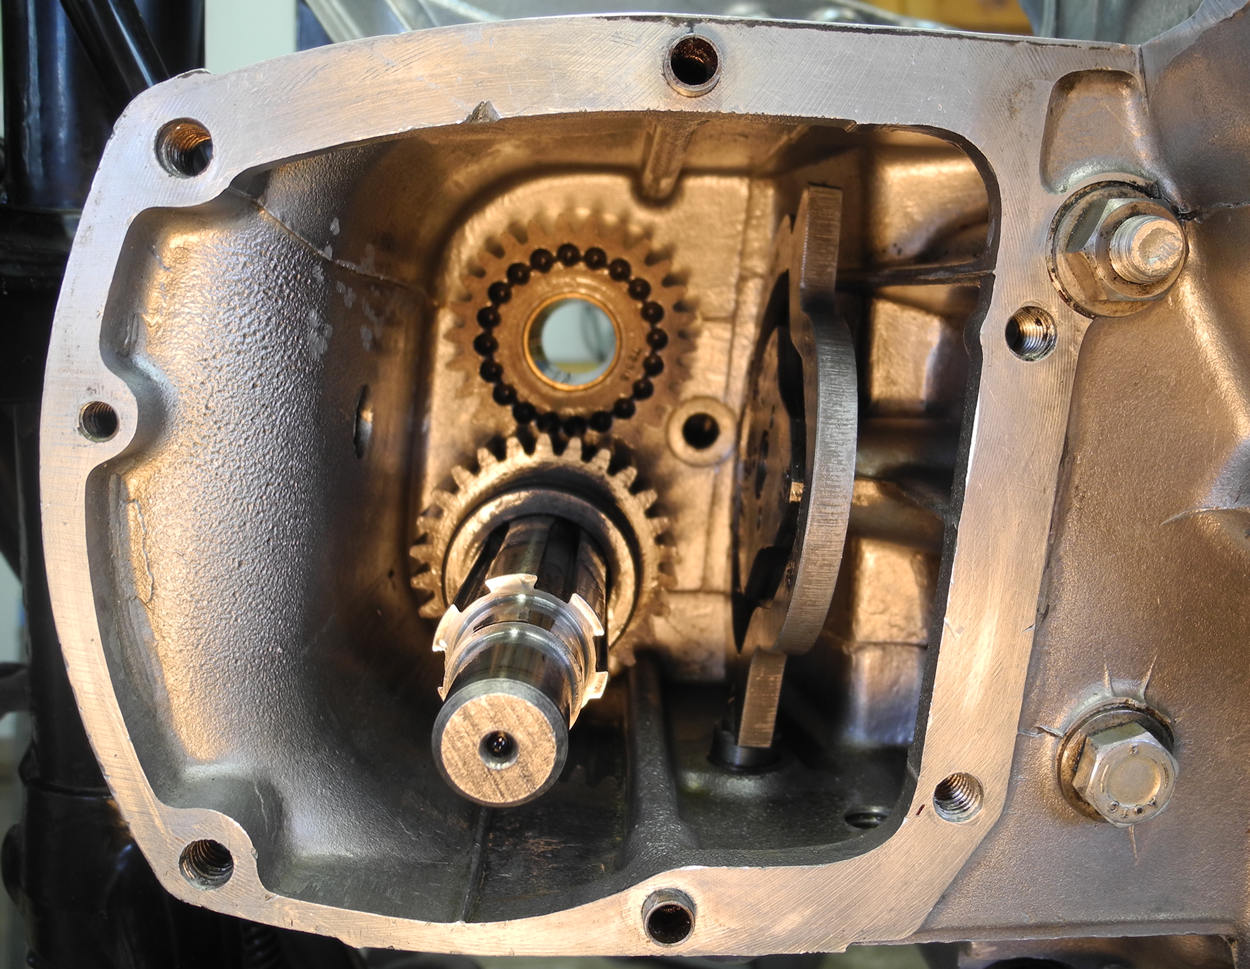 Photo 6. Layshaft 2nd gear.
Now lubricate and slide on 3rd gear.
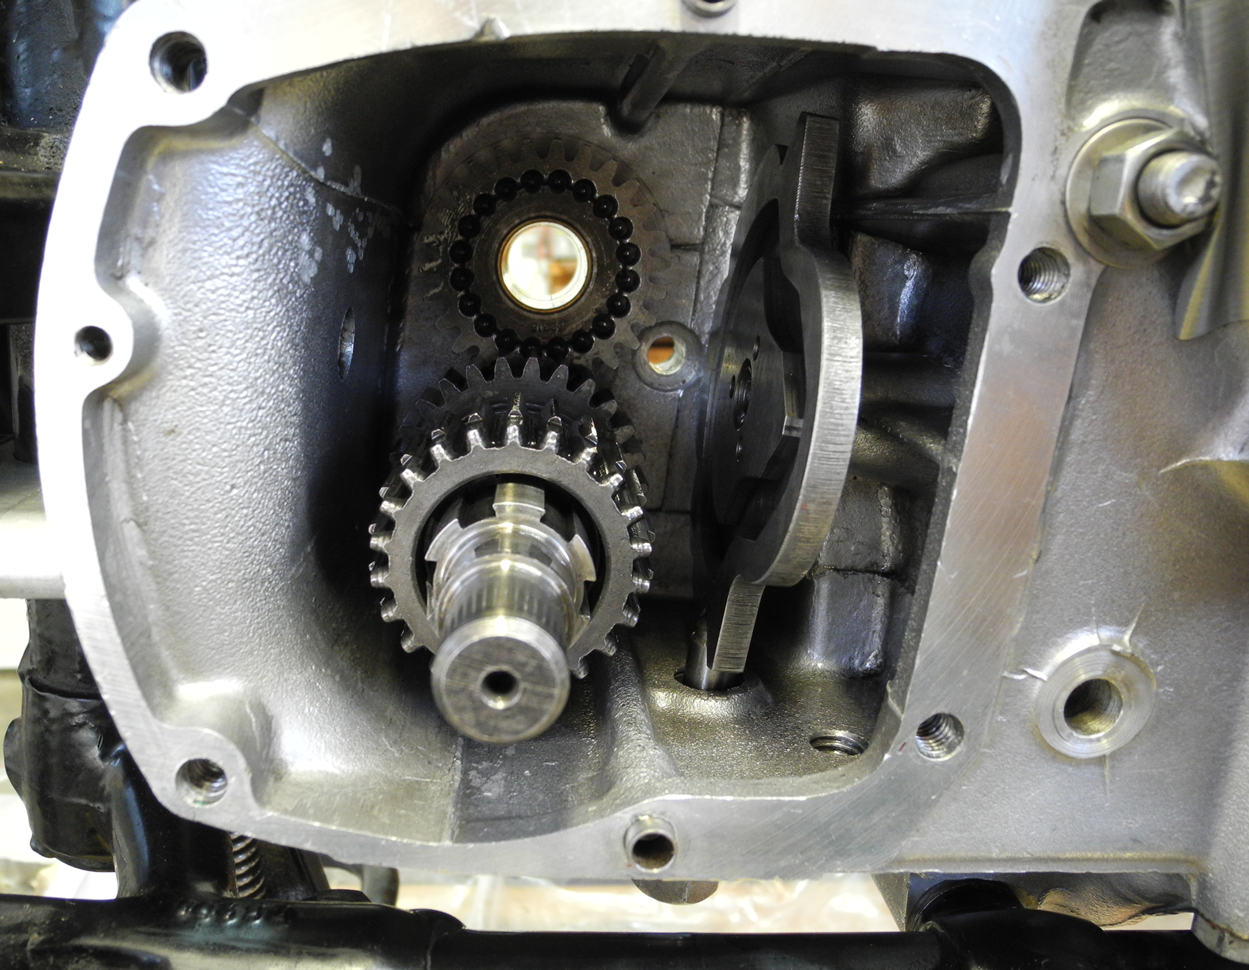 Photo 7. Layshaft 3rd gear installed.
Place a roller on the layshaft selector fork's peg and stick it on with a dab of grease.
To identify the main and layshaft selector forks, look at their 'barrels', not their 'claws'. The fork with the shorter barrel is for the layshaft and the longer barrel one is for the mainshaft.
Fit the layshaft selector fork to the layshaft 2nd and 3rd gears and slide the gears forward or back until the roller locates in the camplate groove to match 1st gear as shown by the red dot in the photo below.
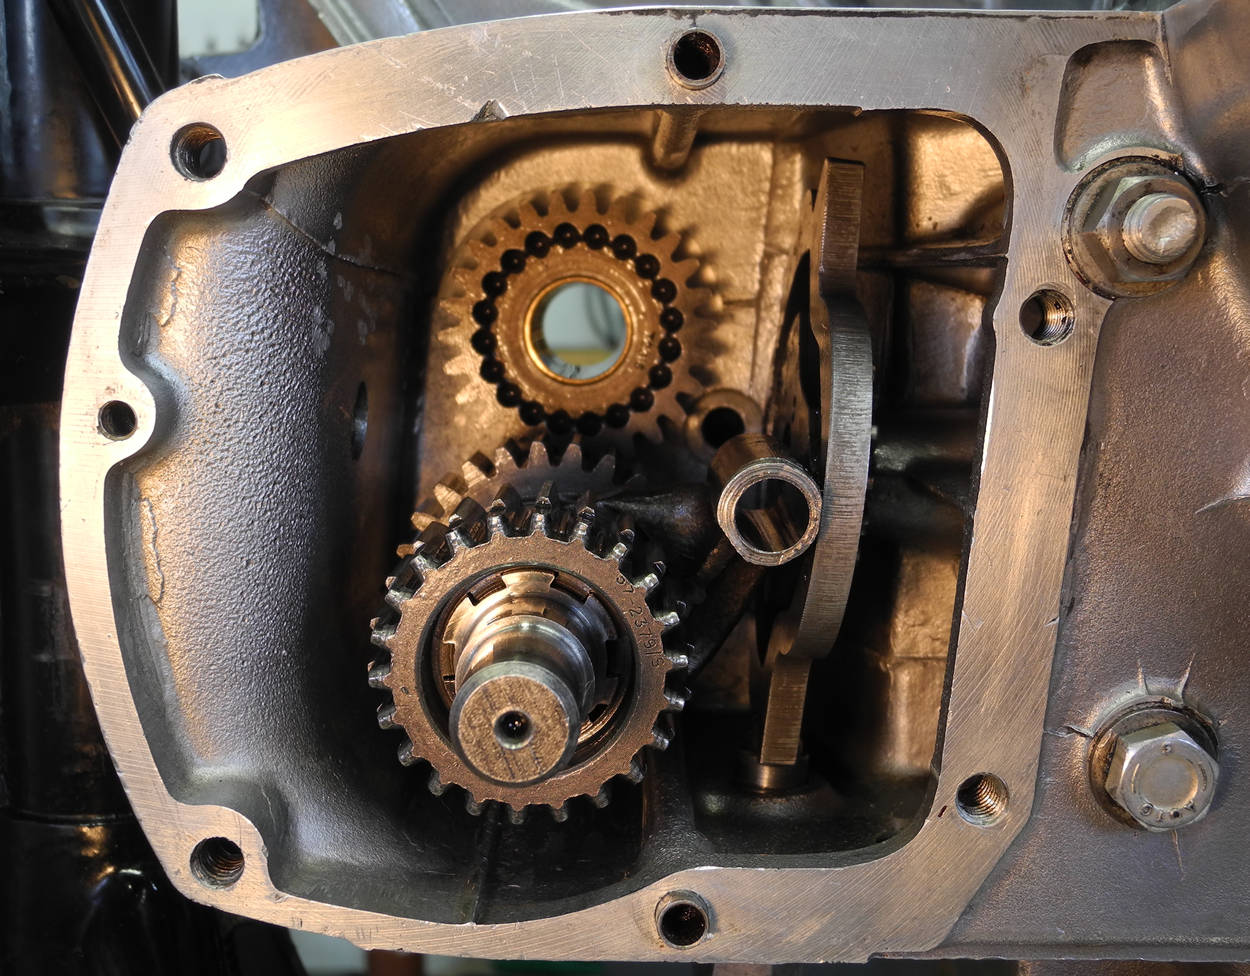 Photo 8. Layshaft selector fork.
The gearshift plunger and camplate are shown in first-gear position at right. The red dot represents the position of the layshaft selector fork peg in 1st gear.
If you're interested, the camplate positions for all gears can be seen here..
Lay the mainshaft selector fork behind the layshaft selector fork and place the roller in 1st gear position in the camplate groove as shown by the green dot in the photo above.
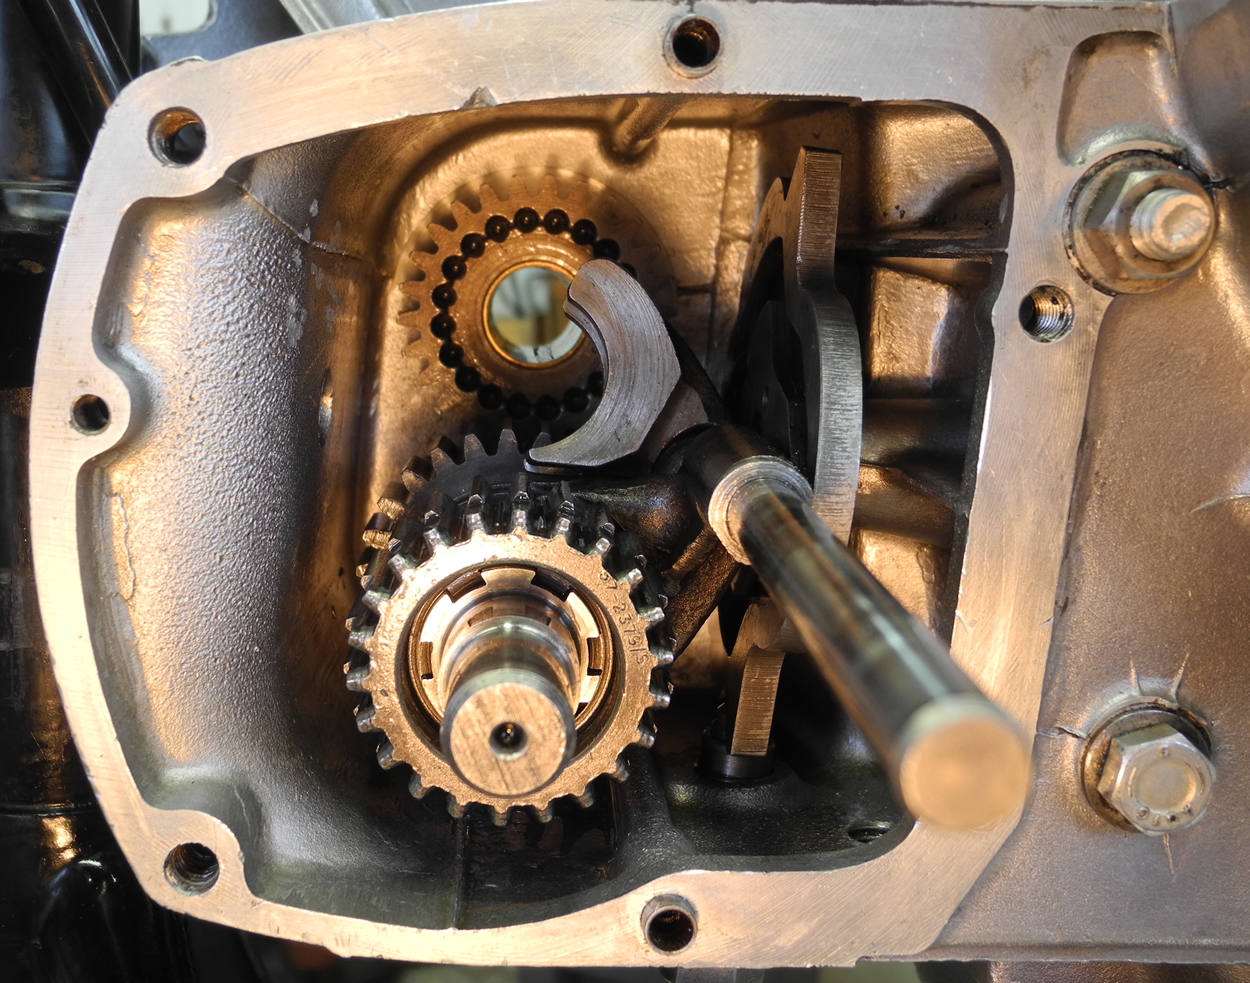 Photo 9. Mainshaft selector fork with selector fork rod started.
Lubricate and then insert the selector fork rod through both gear selector forks and push it in all the way until the shoulder contacts the case.
Also, be sure to seal the end of the rod because the rod drilling goes right through the case and is a common source for leaks. As mentioned above, the rod can be easily sealed from the outside if the gearbox sprocket is not yet installed.
Note. Sometimes the rod slides into its the drilling in the case with no problem, while other times the drilling for the rod remains tantelizingly just out of reach to the right. After experiencing this several times I realized the crux of the problem: the mainshaft shifting fork's roller must be well positioned in its camplate track before inserting the rod in the shifting forks. If the roller is not in the track after the rod is inserted in the shifting forks no amount of fiddling will succeed in inserting the rod into the drilling. The solution is to remove the rod, re-fit the mainshaft shifting fork roller in the camplate and then try again to insert the rod.
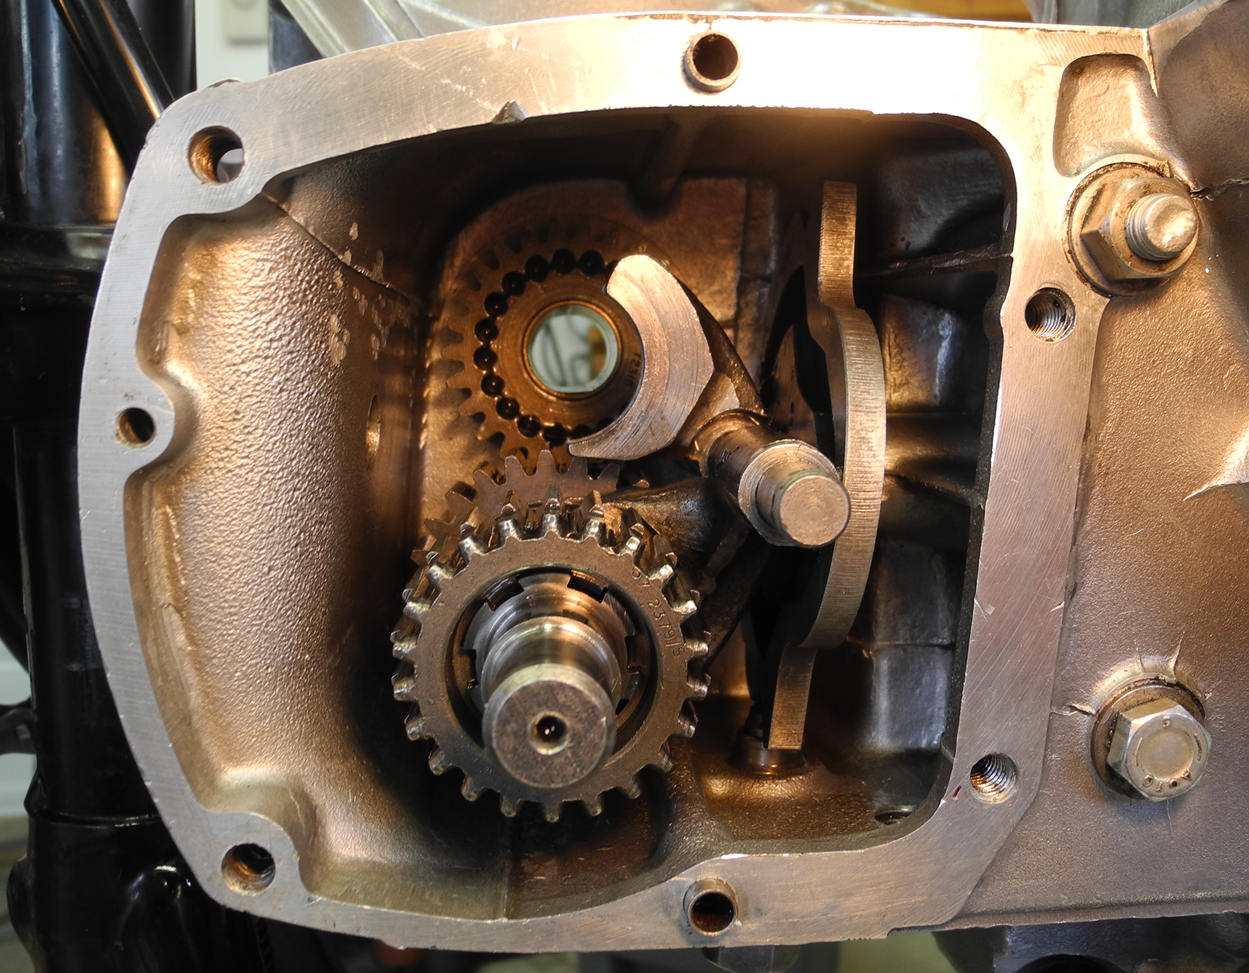 Photo 10. Selector fork rod tapped home.
Next, "fiddle" in the mainshaft 2nd gear, engaging it in the mainshaft selector fork.
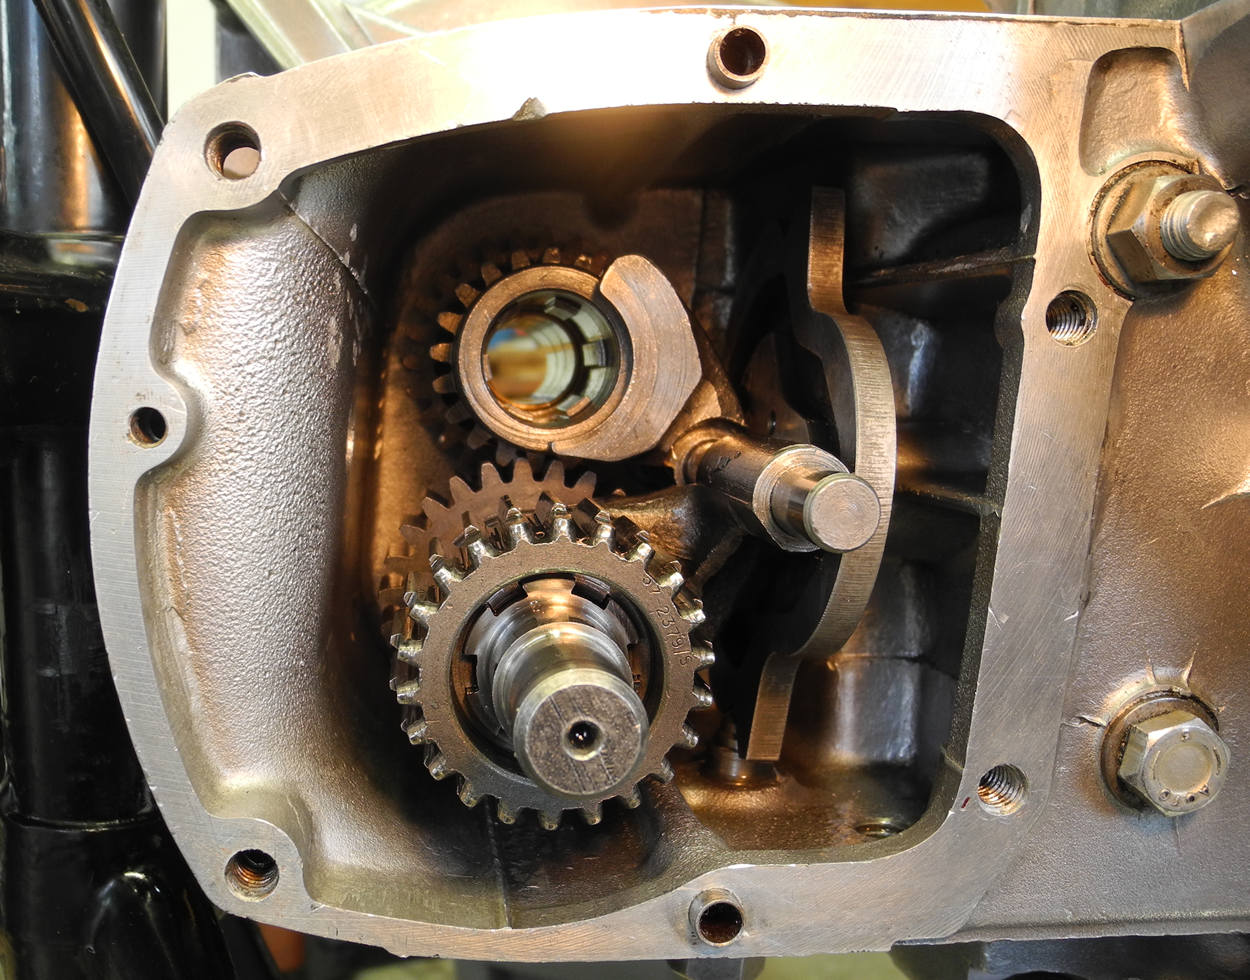 Photo 11. Mainshaft 2nd gear.
Then, "fiddle" in mainshaft 3rd gear, engaging it in the mainshaft selector fork.
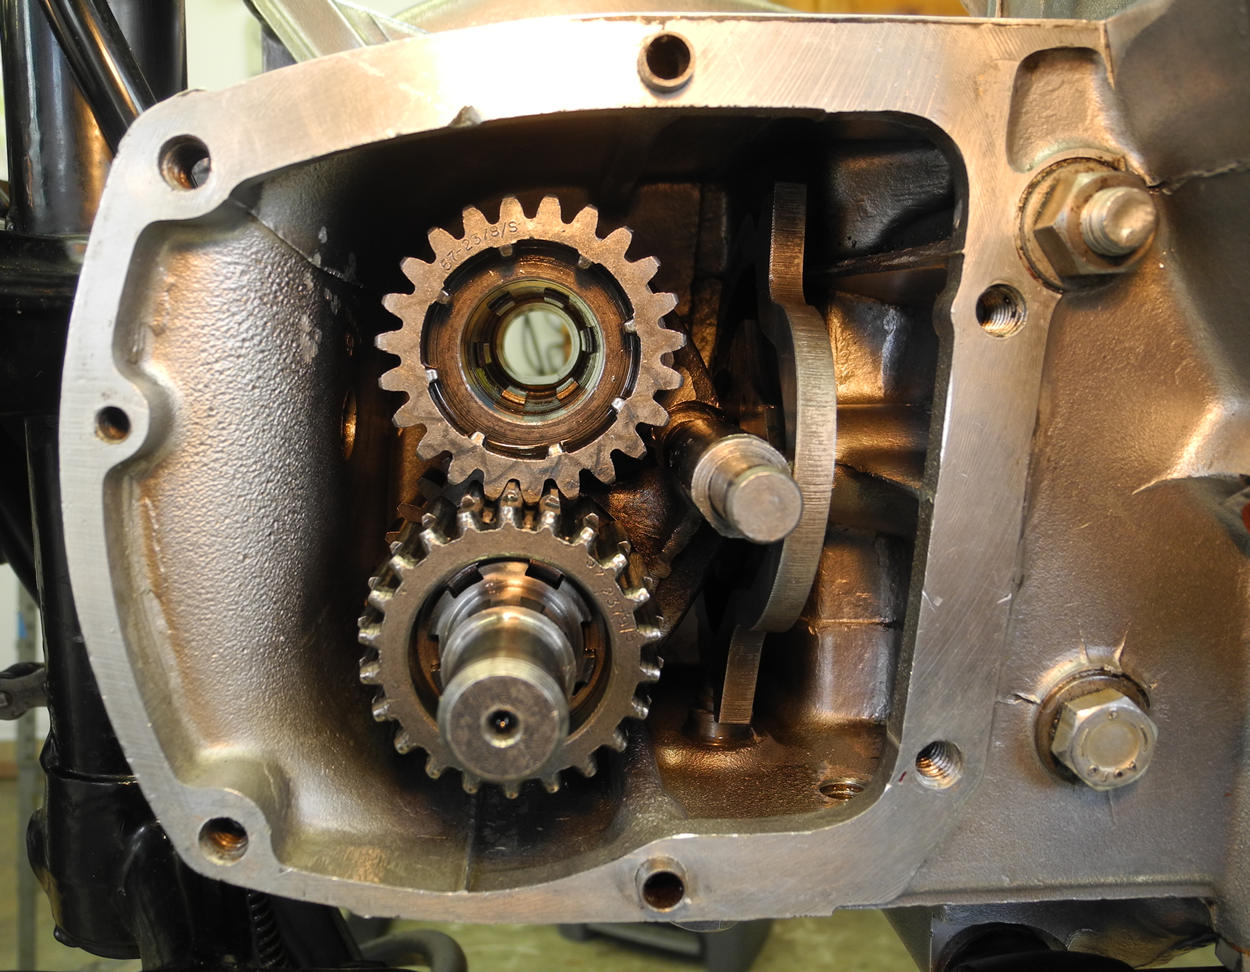 Photo 12. Mainshaft 3rd gear.
Fit the layshaft low gear.
 Photo 13. Layshaft low gear.
The quadrant position should match that shown in Photo 14. Verify this by noting the position of the nearest tooth to an imaginary line extending from the center of the mainshaft along the shaft of the camplate.
 Photo 14. Appearance of correctly assembled and indexed gearbox in 1st gear.